This helps ensure simulation emails are delivered directly to your users’ inboxes -bypassing other security tools that might block them.
Note: A mail connector can unfortunately only help with one part of the whitelisting - the delivery part. It can ensure that the emails get into your users’ inboxes. But it does not tell Microsoft that these mails are simulations. For that you also need to whitelist.
Step 1: Create the Mail Connector
- Go to the Exchange Admin Center
- Click Mail flow - Connectors

- Click Add a connector

- Choose Partner organization and click Next

- Name the connector (e.g., CyberPilot phishing simulation) and click Next

-
Choose "By verifying that the IP address of the sending server matches one of the following IP addresses, which belong to your partner organization"
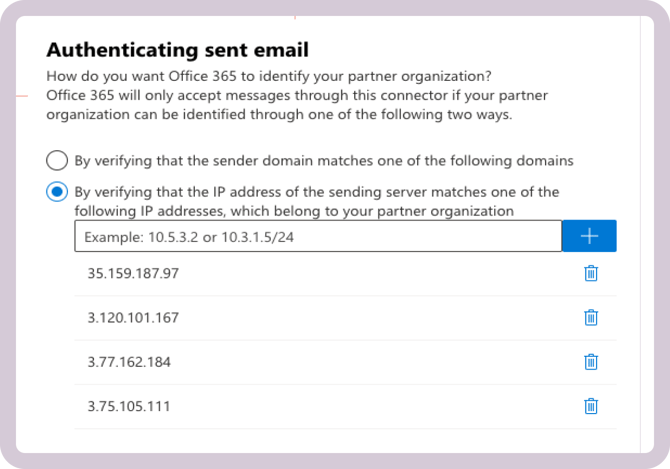
- Enter each of the IP addresses below, clicking + after each one
-
3.75.105.111
-
3.77.162.184
-
3.120.101.167
-
35.159.187.97
- 91.233.64.66
- 91.233.64.65
- 91.233.64.64
-
- Enter each of the IP addresses below, clicking + after each one
-
- Click Next
- Click Next, then Create connector, and finally Done

Step 2: Get your MX Record
- Go to the Microsoft Admin Portal
- Click Settings > Domains

- Click your domain
- Go to DNS records > MX

- Copy the MX value for your domain (e.g., yourcompany-com.mail.protection.outlook.com)

- Repeat for all domains used by your users
- Login to the CyberPilot App > Campaigns > Start whitelisting
- Copy/Paste your MX record into the box:
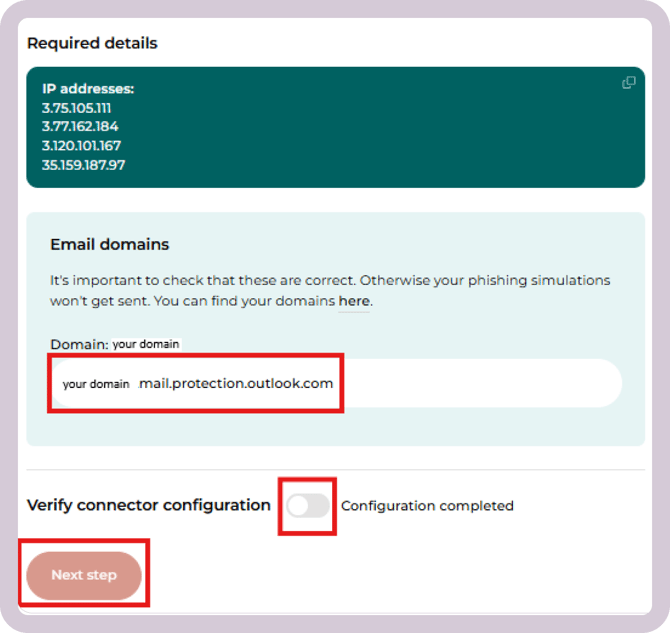
Example:
"cyberpilot.io" & "cyberpilot-io.mail.protection.outlook.com" "cyberpilot.dk" & "cyberpilot-dk.mail.protection.outlook.com"
Step 3: Test the Setup
- Log in to the CyberPilot Platform
- Go to Phishing > Campaigns
- Click the … next to the relevant simulation
- Click Send a test email
- Fill in your name (this will populate name fields in the email)
- Click Send and check your inbox for the test email
Step 4: Confirm Success
Once you’ve received the test email successfully, let your Customer Success Manager know that the setup is complete.
Still have a question?
Contact us at support@cyberpilot.io