With the training planner, you can create onboarding plans for users who haven’t joined your organization yet and schedule training for your users months in advance.
On this page, we will take you through how to use the training planner to schedule training for your users.
Here's a quick video showing how the feature works:
You can have many different plans
You can use the training planner to set up different plans for different user groups. This allows you to tailor the training to specific audiences.
For example, you can create a plan for the “X department” group or the “X Office Location” branch. That way, you have the option to customize the training users get based on, e.g., their role.
And if you want to keep it simple, you can set up a plan for the whole organization to follow and leave it at that.
There are two types of plans: training and onboarding.
- A training plan is your regular ongoing training for users in your organization. Use it to schedule enrollments for specific dates in the future.
- An onboarding plan is the training you want new users to receive when they join the organization, a group, or a branch. It enrolls dynamically, so users get the training a certain number of days, weeks, or months after they join.
- Your onboarding plan will automatically give new users a starting package of training.
- Your training plan will handle the continuous training going forward, meaning new users join the same ongoing training flow as everyone else – rather than being enrolled in all previously released courses.
Status of onboarding plan
Every onboarding plan is either active or inactive, and you can see which at a glance from the status pill on the plan overview.
-
Active - the plan is live. New users added to the account, group, or branch it applies to will receive its training.
-
Inactive - the plan is paused. Users can be added without receiving any training from the plan.
-3.png?width=670&height=287&name=image%20(6)-3.png)
New onboarding plans start out inactive. This protects you from accidentally sending training to users you upload before you're ready — for example, while you're still setting things up ahead of your go-live date.
Automatic activation on your go-live date:
If you create an onboarding plan before your go-live date, you don't have to remember to switch it on. Any inactive onboarding plan automatically becomes active on your go-live date, so users added after go-live get their onboarding training as expected. While the plan is inactive, you can see which date it will become active on the plan.
Turning a plan active or inactive yourself:
You can switch a plan active or inactive at any time — also after go-live. Useful when you want to add or move users without triggering onboarding content (e.g. moving someone into a group whose training they've already had). You can set the plan inactive, add or move your users, then set it active again when you're done.
-
Open the onboarding plan and click Edit.
-
Use the active/inactive toggle.
-
Click Save.
You can customize your re-enrollment settings
You might want to re-enroll trainings occasionally to keep your organization fresh on topics they learned about in the past.
By default, a user will not get a training enrolled to them via the training planner if they were enrolled to that same training within the last 180 days.
You can change this default setting under your account settings if you'd like.
Account level re-enrollment setting
To adjust this setting, just go to "Account" and edit the number of days listed in the field called "skip users already enrolled in the last..."
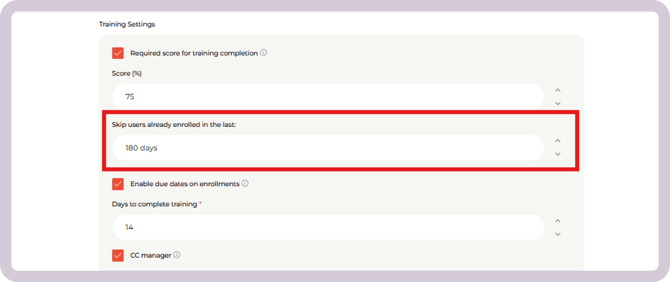
The number of days you have in this field applies to all of your training planner enrollments.
Content level re-enrollment setting
You can also make re-enrollment settings for specific trainings if, e.g., you want all users to get the "Phishing" course - even if they were enrolled to it 3 months ago.
You edit re-enrollment settings for a specific piece of content directly in the training planner.
Within the training plan, find the content, and then edit the settings for it. Turn the toggle called "Skip users already enrolled" OFF. Then save the training plan when you are finished.
You have now updated the re-enrollment settings for that training only.
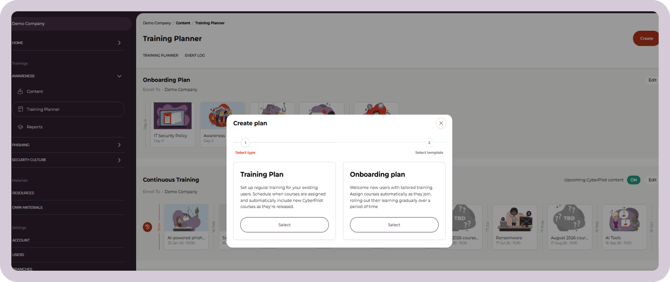
How to make a new plan
- Click on "Awareness" to reveal the dropdown menu, and select "Training Planner"
- Click "Create"
- Select the type of plan you want to create - training or onboarding
- Determine if you want to use our "Recommended" plan or start from a "Blank" training plan, which you fill in yourself. Select the option you prefer and click "Create"
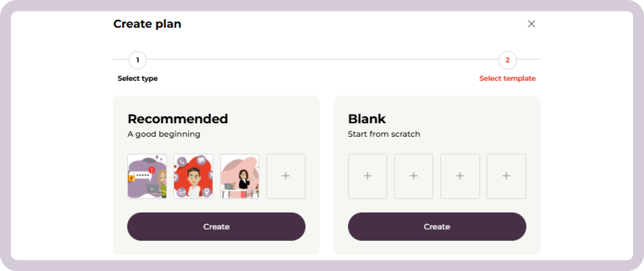
A recommended plan vs. a blank plan
Our recommended training and onboarding plans
If you choose a recommended plan, the plan will automatically be populated with training content selected by our learning design experts.
-
Recommended onboarding plan: Automatically includes 4 selected training items for new users.
-
Recommended training plan: Automatically includes a structured first-year training program.
You can always review the content, remove training items, or add your own before saving the plan.
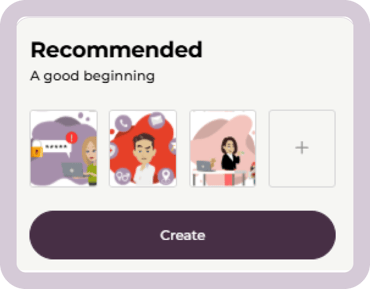
After you select the "Recommended" plan, you'll have the option to review the content in the plan and add/remove courses for further customization.
Then, just insert the correct enrollment dates, press save, and you are done!
You can read more about our recommended plan and why it works here.
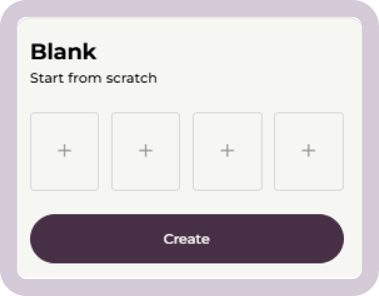
A blank plan
If you select a blank plan, you can build your own training plan from scratch. This is a good option if you have very specific training needs.
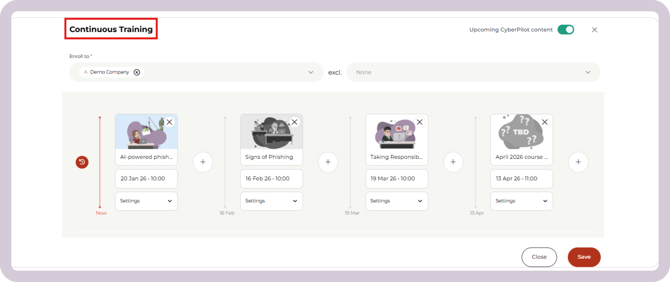
Add Upcoming CyberPilot content to your training plan
We release a new course every other month, and you can easily have them automatically added to your training plan. To do this, just enable the toggle called "Upcoming CyberPilot content".
Once you do that, our upcoming content will populate in your training plan. You can tell the difference between our released and upcoming content, because the upcoming trainings have gray images. As we prepare new trainings, those will also be added to your training plan.
The date of enrollment for upcoming content will always be the day we publish it. If you want the training to be enrolled on a different day, you are welcome to adjust that in your training plan.
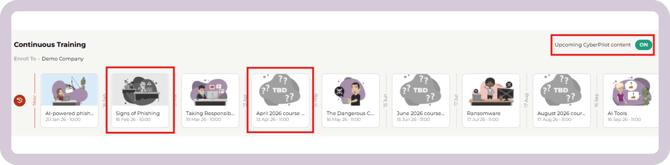
We recommend you enable this toggle, so your users always get the most recent material. This will keep them up to date on emerging trends.
Here is how you fill in the blank plan:
- Click the "+" icon to add content to your plan
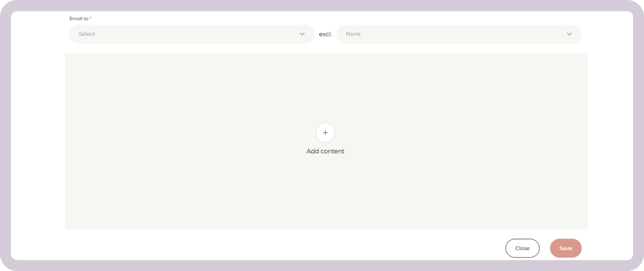
- Add the content you want to the plan and give each of them an enrollment date
- Click "Save"
Setting up your training plans
After you have selected the type of training plan you are creating and whether you are using our recommended plan or a blank canvas, you can get to customizing it!
- Select who you want the training to "Enroll to" - you can make a training plan for the entire account, branches, or groups
- Select if you want to exclude any users
- Indicate a date/time period when the content should enroll
- Customize the re-enrollment settings if you want
- Use the "+" button to add more content to the plan
- When you are done, click "Save"
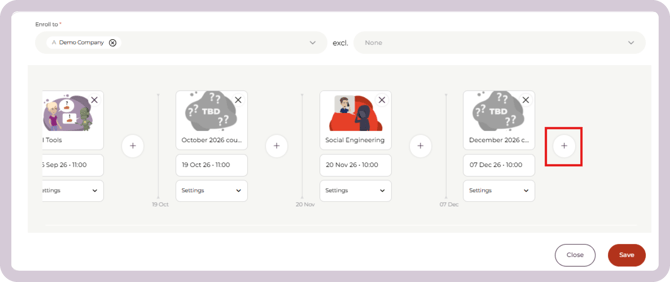
Here's how it looks with a training plan
The enrollment dates are specific dates in the future.
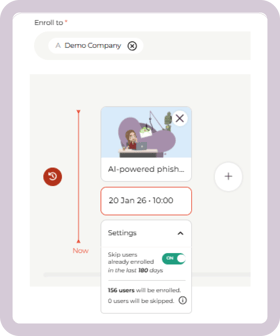
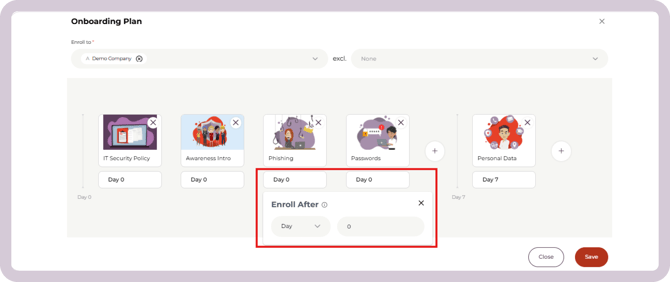
Here's how it looks with an onboarding plan
The enrollment dates are dynamic, so training enrolls after a certain amount of time
How we recommend you use the training plans feature
- We advise you to use our "Recommended" plans when populating your training and onboarding plans for the first year
- We advise you to automatically add our upcoming content to your training plan. That way your users always get the most timely content
- We advise you to have one training plan and one onboarding plan - each for all users in the organization.
- This is the simplest way to maintain your training. If you feel you should have a customized training plan for certain users or groups, that option is available to you.
- A good example of when this could be helpful is if you need to train, e.g., board members, who should get some training, but not necessarily the same courses at the same time as your general users.
- You are always welcome to talk with your Customer Success Manager about the right level of training complexity for your organization.
Editing your training plans
Edit the content and dates
It’s possible to make changes to any content that will be enrolled in the future. Any edits you make will affect all the users the training plan applies to, as soon as you press “Save”.
- Click "Edit" in the upper right corner of the training plan
- Press the "X" icon to remove a future training, "+" to add content, or click on the date to change when the content is enrolled.

Edit the name of the plan
If you want to rename a training plan, start by clicking "Edit" in the upper right corner of the plan. Then, click on the icon next to the name of the plan to make changes to the plan name. When you are done, click "Save".
Change whether a plan is active or inactive:
For onboarding plans, click Edit, then use the active/inactive toggle to set the plan active or inactive. Remember to click Save when you're done.
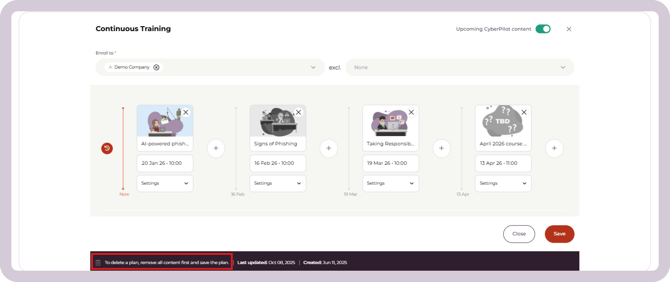
Deleting a training plan
In order to delete a training plan, you must first remove all of the content within the plan that are scheduled for the future. A deleted plan cannot be recovered.
Once you have removed all the content from the plan, you an click the trash can icon to delete the plan.
The users’ training completion data will not be effected by the deletion of a training plan. Any trainings that were already enrolled through the plan will not be effected.
Still have a question?
Contact us at support@cyberpilot.io